There are a few things we can check to ensure that we can print from the label printer:
- Printer is properly turned on.
- Cables to the printer are properly connected.
- Printer does not have a RED Error message.
- We are printing to the correct printer.
- Printer Settings are correct.
Printer is Properly turned on
For this step, we want to make sure that tht printer is receiving power. We can check this by first making sure that the printer is powered on, and has information on its screen. If we don't see informaton on the screen, we then want to check the back side of the printer to make sure that the power cable is connected, and that the other end of that power cable is also connected to an outlet that has power. To make sure the outlet is good, we can always plug in a phone charger and see if it charges a device.
Cables to the printer are properly connected
The placement of the cables is one of the most important parts of the communication from the printer to the computer. We should have only two cables from the printer being:
On the Printer side, you'll be able to find the 5 connections on the back-right side of the printer. They will look like the image below. For our Data, we will want to use the middle-most connection, that has a USB trident symbol next to it. In this image, we've marked it in red for you.

Printer does not have a RED error message
Once we make sure that all the cables are in place, we next want to see if we have any error messages on the
printer screen. These normally would light up the printer screen in a
red light, and also provide us error codes related to what is causing the printer not to print.
Error codes can vary, but they help us understand if the issue is related to the way the roll of labels is
positioned in the printer, or if it is caused by the code the
computer sends to it. Below are a few examples of errors and what they mean:
If your printer has any of these error messages, please see the Printer Settings part of this guide to learn how to configure it. Alternatively, sometimes these messages also require us to clear the errors after adjusting the settings which we can do by turning the printer off and back on using the power switch above the Power Cable.
Printing to the correct Printer
A common issue that we have is that sometimes, our Label printer is set as the Default printer for the
computer, which sometimes can be overlooked and we end up printing
everyday documents to the label printer instead of our document printer. This may seem simple, but it can
cause some big problems in the printer's settings.
The first thing we want to do if we accidentally print to the label printer, is to turn it off and back on
to clear the error codes. Then on the computer, we want to clear any
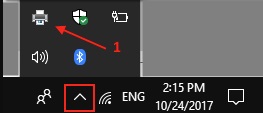
current documents in line to be printed. We can do this by clicking on the small printer icon on the bottom
right of our screen, near the clock:
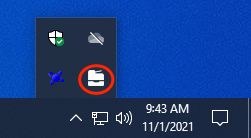
Alternatively, you're printer icon may look like this instead:
Once you locate this icon, you want to double click it, and make sure that all the documents currently in
queue to print are deleted from that queue. You can do this
by selecting all the items in the queue and hitting the Delete button on the keyboard. Once we delete all
the items in the queue, we can then restart the printer,
check our settings, and then reattempt to print.
Printer Settings
For our final section, we will want to make sure the printer is set correctly to print the labels we need, as
well as understand the label type we use.
First, we want to go to the MENU from the main screen. From there we can use the arrows to navigate the menu
and get to SETUP, then SUPPLY. Once in Supply, we want
to make sure the following settings are set. Make sure to confirm your changes so they save.
Once we make these changes, we then want to restart the printer, and attempt our print again. If you still have trouble printing after these steps, please reach out to us at IT so that we can assist you.